Make a simple outdoor stove: proper instructions
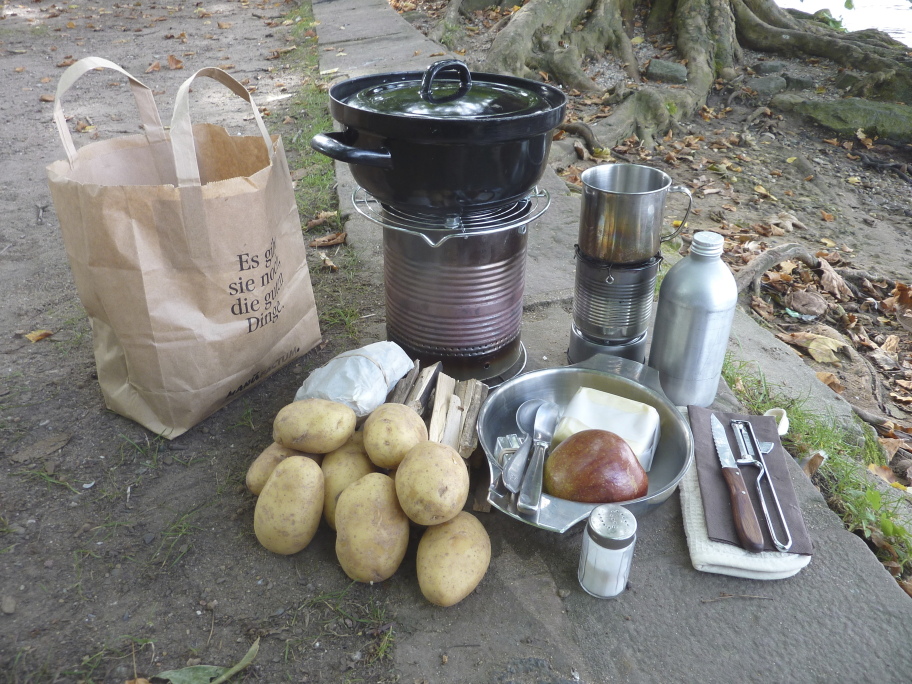
This is a small wood-burning hobo stove made from a clean steel food tin. It is for boiling a small pan of water outdoors, not for heating a tent, cooking indoors or producing a large fire. Its enclosed sides concentrate heat but also make the metal extremely hot and can scatter sparks. Use it only where solid-fuel fires are permitted, on bare mineral ground or another non-combustible surface, with water ready to extinguish it.
Materials and tools
- A clean, unlined steel food tin about 800 ml to 1.5 litres, with the label and any plastic coating removed. Do not use a pressurised can, paint tin, galvanised container or unknown metal.
- Can opener, marker, ruler, nail and hammer or centre punch, drill with 6–10 mm metal bit, tin snips, file and pliers.
- A small steel grill or three steel tent pegs/short bolts to support a pan.
- Dry pencil-thick twigs, a firelighter or dry natural tinder, matches or lighter, small pan and water.
- Leather work gloves, safety glasses, a metal tray or paving slab, water or a fire extinguisher, and a lidded metal container for cooled ash.
Legal and site boundaries
Check the landowner’s rules and current local fire restrictions before lighting anything. Public parks, beaches, campsites, common land, nature reserves and woodland may prohibit fires or require a designated fire pit. In the UK, do not collect wood from private land without permission; lighting fires in or close to woodland can also create criminal and civil liability if it causes damage. Never light this stove during a wildfire warning, in prolonged dry conditions, in high winds, under low branches, on peat, near dry grass, or where smoke could affect neighbours or roads. A portable gas stove may be the safer permitted option.
Make the stove
- Wash the tin and remove food residue. Work only with a plain steel tin. If you are unsure whether an internal coating is safe under heat, choose another container; do not burn paint or plastic coatings.
- Open the top fully with a can opener and file the rim smooth. A folded rim is less hazardous than a jagged cut edge. Wear gloves while handling cut metal.
- Mark a rectangular fuel opening at the lower side: about 60 mm wide and 45 mm high for a medium tin. Keep its bottom edge 10–15 mm above the base so the bottom remains strong. Punch a hole in each corner, cut between holes with snips, then bend or file every sharp edge flat.
- Mark a ring of air holes around the lower side, below or level with the opening, and a second ring about 25 mm below the top. Drill 6–10 mm holes spaced about 25–35 mm apart. Lower holes feed the fire; upper holes let hot gases mix with air and also reduce smoke. Remove burrs with a file.
- Make a pan support. The simplest method is to lay a small steel grill across the opening. Alternatively, drill three pairs of opposing holes about 15 mm below the rim and slide three steel pegs or bolts through them. They should support the pan while leaving most of the top open for exhaust.
- Set the finished stove on a paving slab, metal tray or bare mineral soil. Do not set it on a wooden table, plastic groundsheet, rock that might fracture from heat, or a surface with dry leaf litter beneath it.
Light and use it
- Clear a generous area around the stove of leaves, grass and loose combustible material. Keep a bucket of water or extinguisher within arm’s reach, and keep children and pets back. Confirm wind will not carry sparks towards tents, vehicles or vegetation.
- Place a small firelighter or tinder inside, followed by a loose handful of dry twigs. Light it through the fuel opening. Do not use petrol, alcohol, aerosol, white spirit or any liquid accelerant.
- Feed twigs through the opening a few at a time. A stove works best on short dry fuel, not logs. Put the pan on only once the flame is steady, and never leave it unattended.
- For a water test, heat a measured amount of water until it reaches a sustained rolling boil. This confirms the stove draws air and the pan support is stable. Treat all stove metal and the pan handle as hot; use a glove or pot lifter.
- When finished, stop adding fuel and let the embers burn down. If you must extinguish it, add water slowly and carefully from a distance to avoid a burst of steam and ash. Stir only with a metal tool, then add more water until the ash is cold to the touch.
Checks and common mistakes
- If the flame is smoky and weak, use drier, thinner twigs and check lower air holes are not blocked. Do not enlarge holes while the stove is hot.
- If the pan rocks, reposition or remake the support before heating food. A stable pan is more important than maximum heat.
- Do not use the stove in a tent, porch, vehicle, shed or other enclosed or partly enclosed place: carbon monoxide is colourless and can kill. Keep it well away from combustible walls and roofs.
- Do not pour hot ash into a bin, leave it under a bush, or bury live embers. Pack out all litter and dispose of fully cold ash where permitted.
- Thin tins eventually burn through. Discard a rusted, distorted or cracked stove rather than trying to use it again.
A successful first use is a controlled small flame, a stable pan and a completely cold stove at the end. If any of those conditions cannot be maintained, put it out and use a safer cooking method.