Learn to tie a bowline: proper instructions
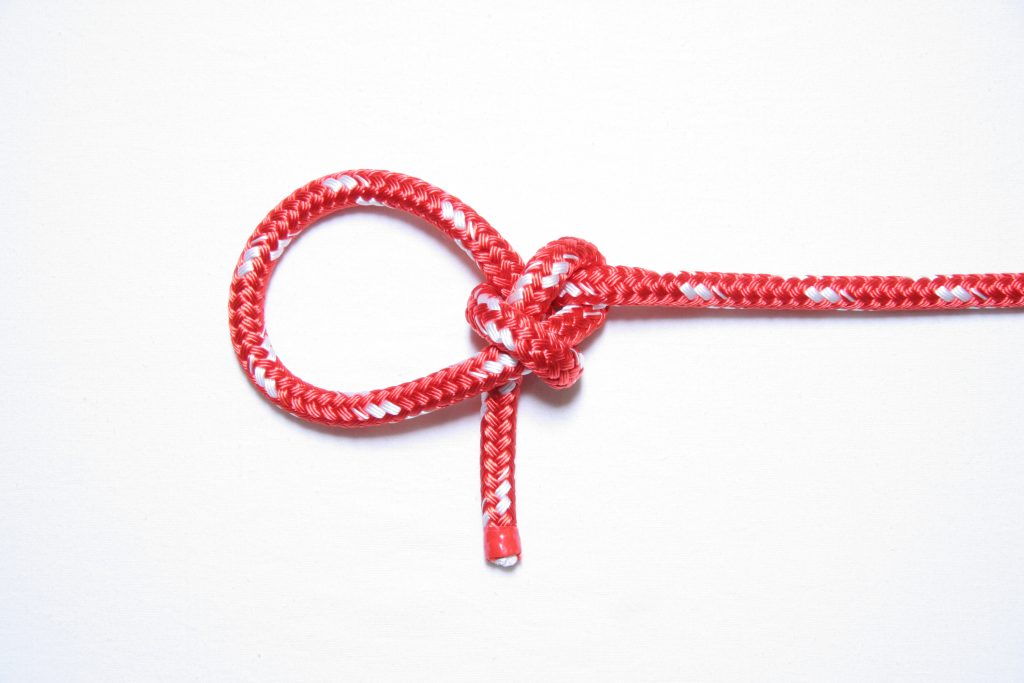
A bowline makes a fixed loop that does not tighten under load. It is useful for attaching a rope to a ring, making a rescue loop, or securing a line where the loop must remain a known size. It is not a substitute for suitable climbing knots and systems, and it can work loose if it is repeatedly unloaded, shaken, or tied carelessly. Learn it first with a short piece of rope at ground level.
What you need and what to know first
- A 1.5 to 2 metre length of ordinary rope, cord or paracord; use a rope thick enough to see clearly.
- A fixed object such as a railing or ring if you want to practise tying around something.
- The ability to identify the
standing part(the long load-bearing part) and theworking end(the end used to tie).
Inspect the rope before use. Do not use a bowline to lift people, support a climber, or hold a critical load unless you are trained for that activity, using the appropriate rope and a system chosen for it. Keep fingers clear while anyone else loads a rope.
How the knot is formed
- Decide how large the finished loop needs to be. Leave a working end of at least 20 cm for practice; more is easier. If tying around an object, take the working end around it first.
- Hold the standing part in one hand. Make a small loop in it, called a bight, with the working end crossing on top of the standing part. For a right-handed learner, it is often simplest to have the working end point towards you and the loop opening upwards. The direction is not important; consistency is.
- Bring the working end up through the small loop from underneath. This is the first part of the familiar ‘rabbit comes out of the hole’ memory aid.
- Pass the working end around the back of the standing part. It must go around the standing part, not around the side of the small loop.
- Bring the working end back down through the same small loop, entering from above. It should now lie beside, rather than cross through, the first pass.
- Hold the working end and the loop you have made, then pull the standing part to begin dressing the knot. Dress means arranging each turn so it lies neatly and without unwanted twists.
- Set the knot by pulling firmly on the standing part and the loop together, then on the working end. The knot should compact into a recognisable collar around the standing part, with a fixed loop beyond it.
Check it before relying on it
Look at the knot rather than relying on the story. The working end should emerge from the small loop, go round the standing part, and return through that same loop. The loop around the standing part is the collar. It should sit snugly against the knot; it should not be crossed, half-formed, or trapped by another turn.
Leave a sensible tail beyond the knot. For light practice, 10 cm is a useful minimum visual check, but the required tail depends on rope diameter, material and intended use. A very short tail is a warning sign. Pull the standing part to load the loop and verify that the loop does not shrink. Then release it and inspect again. In a bowline, the main loop remains fixed, although the knot itself tightens slightly when set.
Practise sequence
- Tie ten bowlines in open rope, naming the standing part and working end each time.
- Tie them around a railing, post or ring, ensuring the object is inside the finished loop.
- Untie each by pushing the collar away from the standing part, rather than yanking at a loaded knot.
- Compare a correctly dressed bowline with one tied in a hurry. Photograph both if that helps you notice the collar and tail.
Common mistakes
- Loop on the wrong part: making the initial small loop from the working end rather than the standing part can produce a different, less familiar arrangement. Slow down and identify both parts first.
- Returning through a different opening: the working end must return through the original small loop. If there are two possible holes, undo it and start again.
- Crossed collar: a twist or crossing may leave the knot poorly dressed. Re-form the collar so its turns sit parallel.
- Tail too short: retie with more working end rather than trying to pull extra tail through a tightened knot.
- Assuming it cannot loosen: a standard bowline can loosen in some cyclic or unloaded situations. Inspect it frequently and use an appropriate backup or another knot when the application demands it.
Safety and care
A bowline is excellent for general-purpose ropework but knot choice is activity-specific. For towing, boating, climbing, lifting and rescue, follow the relevant competent organisation’s procedures and use equipment rated for the job. Never stand in line with a heavily tensioned rope; if it fails, it can recoil. Avoid tying knots in damaged, oily, heat-affected or unknown rope. After practice, untie the bowline and coil the rope dry and away from sunlight and chemicals.