Build a Weather Station: proper instructions
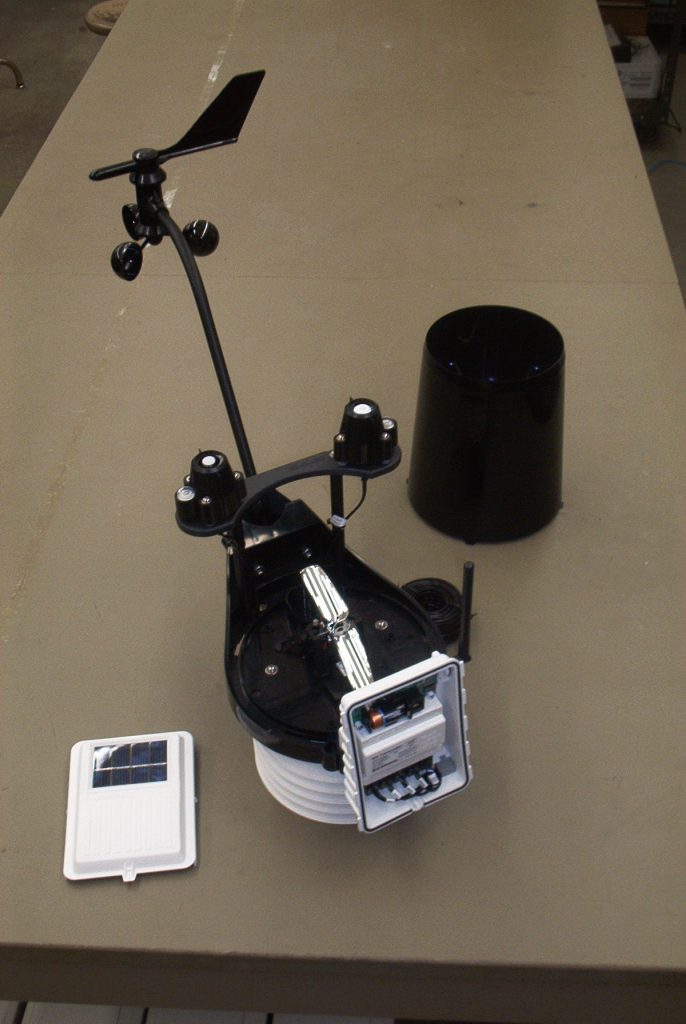
A home weather station can measure conditions at your property and display or log them locally. It will not be as comparable with an official meteorological station unless the siting, calibration and equipment meet professional standards, but it is excellent for learning, gardening and noticing local changes. Begin with temperature, humidity and pressure indoors or in a sheltered outdoor enclosure; add rainfall, wind and air-quality sensors only when you can site and maintain them properly.
Plan the measurements and location
List the measurements you actually need: temperature, relative humidity, barometric pressure, rainfall, wind speed, wind direction, soil moisture or light. Every sensor has limits. Temperature sensors respond to sunshine and nearby walls; rain gauges need a clear exposure; wind sensors need height and open air. Plan a local display, a CSV or database log, and a backup before wiring anything. A small microcontroller can log a few sensors; a Raspberry Pi-class computer is useful for dashboards and network services. You can combine both, but keep the design simple initially.
- Basic parts: controller, reputable temperature/humidity/pressure sensor, weather-resistant enclosure, power supply, cable glands, mounting hardware and a computer or service for viewing data.
- For outdoors: UV-resistant cable, drip loops, corrosion-resistant fixings, a radiation shield for temperature and humidity, and appropriate strain relief.
- Optional sensors: tipping-bucket rain gauge, anemometer and vane, soil probe, particulate sensor. Read each manufacturer’s voltage and interface requirements.
- Tools: multimeter, small screwdrivers, wire stripper, heat-shrink, labels and a laptop for programming.
Prerequisites and safety
Read the datasheet for every sensor before connecting it. Confirm voltage levels: many modern sensors use 3.3 V logic and can be damaged by a 5 V supply or input. Turn power off before altering wiring. Outdoor low-voltage wiring still needs protection from water, UV damage and accidental pulls. Use a certified outdoor power arrangement where mains power is involved, preferably have the low-voltage supply indoors, and do not install equipment on a roof, mast or ladder in wind, rain or near overhead electrical lines. Lightning is a serious risk for elevated masts: follow local electrical rules and seek a qualified installer for permanent high or exposed installations.
Build and configure
- Assemble the controller, sensor and power supply on a desk first. Connect only one sensor at a time using the pinout and example circuit from its manufacturer or established library documentation.
- Install the supported software library and run its basic example. Record raw readings for temperature, humidity and pressure. Compare them with a second indoor thermometer only as a rough sanity check; do not force the numbers to match exactly.
- Add robust error handling in your program: identify failed reads, retain no misleading zero value, timestamp every sample, and log sensor errors separately. Use a reasonable interval such as one to five minutes for general conditions rather than reading constantly.
- Create a simple local record, for example CSV with timestamp, sensor identifiers, values and units. Use ISO-style timestamps and record whether they are UTC or local time. If publishing data, retain raw values as well as any rounded display values.
- Configure networking only after local logging works. Give the station a router DHCP reservation, change default passwords, and choose a dashboard or graphing tool that you can back up. Keep the station usable if the internet is unavailable.
- Move temperature and humidity sensing into a ventilated radiation shield outdoors. Place it over natural ground where possible, away from direct sun, exhaust outlets, air-conditioner discharge, walls, paving and barbecue areas. Mount it at a consistent documented height.
- Install a rain gauge level, with a clear area above it and no roof edge that can drip into it. Remove leaves and insects regularly. Site wind instruments only where they can be secured safely and where nearby buildings and trees do not dominate airflow; compromises should be recorded with the data.
- Seal cable entries with suitable glands, form a drip loop below each entry, label both ends of every cable, and secure the enclosure. Do not fully seal a box that needs pressure equalisation unless the sensor design provides for it.
Testing, calibration and maintenance
- Run the station indoors for 24 hours and check that timestamps advance, files rotate or append correctly, and no readings are obviously impossible.
- Power-cycle it deliberately and confirm it resumes logging without manual intervention. Test a temporary network outage and confirm data storage behaves as designed.
- Check physical sensor readings: shade the temperature sensor briefly without touching it, add a known small amount of water to a rain gauge only according to its calibration guidance, and observe wind pulses or vane direction by hand where safe.
- Inspect graphs for implausible flat lines, sudden permanent jumps, duplicated timestamps and gaps. These are often wiring, power or clock problems rather than weather.
- Set a maintenance calendar for cleaning the rain collector, checking mounts and cable glands, replacing corroded fixings, and comparing sensors periodically with a trusted reference.
Backups, security and common mistakes
Back up source code, configuration, dashboard definitions and raw data to another device. Export data before changing schema or updating software. If the device publishes readings to a cloud service, use a unique account password and a scoped API token where offered; never embed secret tokens in a public code repository. Apply security updates, disable unused services, and do not expose a home dashboard or SSH directly to the internet. A VPN or private overlay network is safer for remote viewing.
- Common mistake: mounting a temperature sensor in direct sun and calling the result air temperature.
- Common mistake: ignoring sensor supply-voltage and logic-level requirements.
- Common mistake: using unprotected breadboard wiring outdoors.
- Common mistake: treating a nearby official weather observation as a calibration target despite different siting and elevation.
- Common mistake: collecting data without checking whether backups, timestamps and sensor failures are visible.
Keep a site log with photographs, mounting height, coordinates only if you are comfortable sharing them, sensor changes and maintenance dates. That context makes your measurements more honest and much more useful over time.